
How To Grow a Sourdough Starter in Your Own Kitchen
Written by Anneke Toliver
Yesterday we began our Dive Study in the book of Ruth. It’s a short, beautiful story, and in it you’ll find several scenes that take place out in fields of grain and in the threshing room. We wanted to take this theme of grain and bread—which appears often throughout Scripture as a picture of God giving His people what they need (*ahem* Bread of Life, anyone?)—and use it to offer something else special to our Dive Collective members. And so the Sourdough Collective Workshop was born.
Sourdough can feel pretty intimidating when you’re just getting started. Years ago, my sister in law gave me some starter and I just couldn’t wrap my head around it. It died. Twice.
When we moved to Cuba, it was at the top of my list of things I wanted to experiment with and understand, and I was determined to grow my own starter and start baking bread the traditional way. And it worked! Sherman my Cuban sourdough starter grew quickly and has been going strong ever since—he’s three years old this summer!
Sourdough is beneficial in many ways: I haven’t seen a packet of yeast in a grocery store for the past several months, but aside from that, it has some great health benefits. It’s full of good bacteria and enzymes due to the fermenting process, and much of the gluten is processed out while it proofs, so it’s easier to digest—often even for those with a gluten sensitivity.
You won’t need a lot of supplies to grow a starter—it’s made up of just flour and water, and it gathers wild yeast and lactobacillus bacteria from the air (the same bacteria found in yogurt). The wild yeast and lactobacillus are what causes sourdough to bubble and rise.

So, let’s get to it! Here’s what you’ll need:
Measuring cups: both liquid and dry.
Scale: a kitchen scale is super helpful at the beginning of growing your starter when you’re figuring out quantities, and most sourdough recipes are written according to weight, so you’ll use it down the road when you bake.
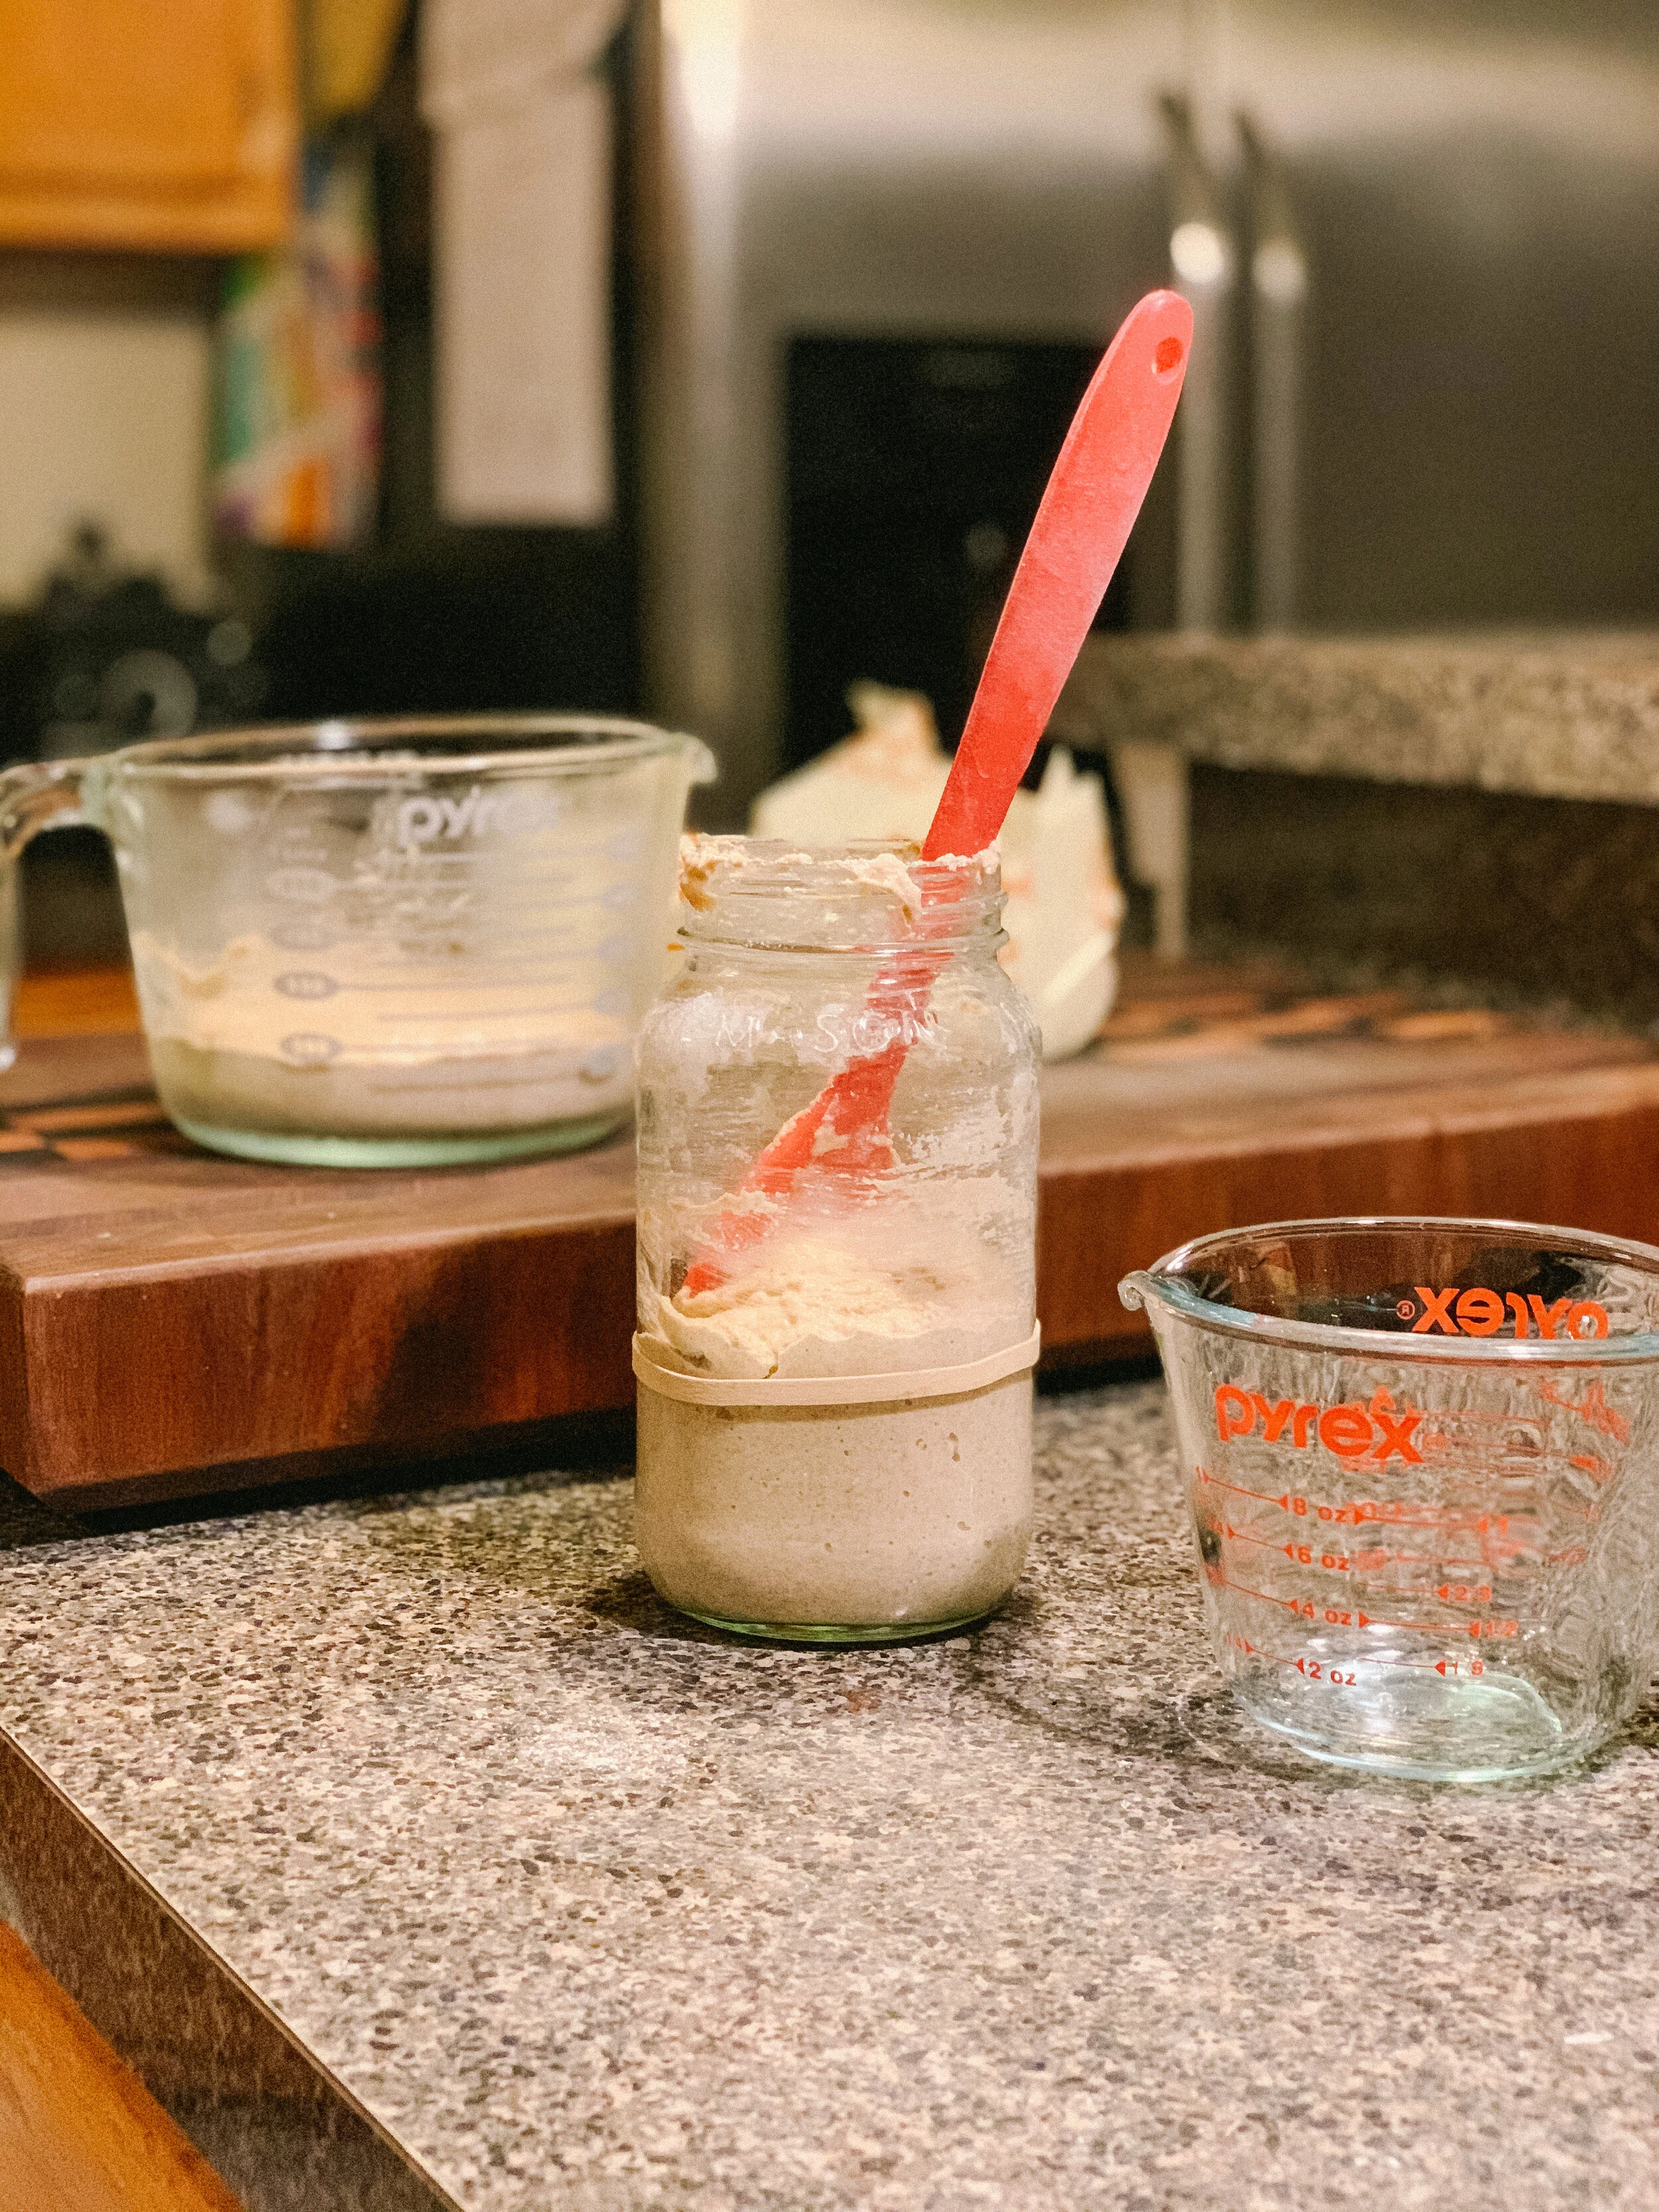
Jar or container: glass, crock, stainless—any of these will work. I like to use a glass jar so that I can easily track progress.
Spatula: I love a solid silicone one (like this) because it scrapes down the sides of my jar really well.
Flour: almost any kind will work. I’ve grown a starter with both organic white bread flour and organic whole wheat bread flour. You could use all purpose, rye, other types of wheat… just choose something that hasn’t been bleached.
Water: you want cool, filtered water. I’ve used water from my fridge filter and also straight from my tap. Just try to avoid heavily chlorinated water as it will kill the yeast and good bacteria you’re trying to grow.

Day 1:
Weigh out 4 ounces of flour and 4 ounces of water. Mix together in a jar—make sure there aren’t any dry spots of flour—and cover loosely. A coffee filter, a kitchen towel, a piece of plastic wrap laid lightly overtop—any of these will work. Even a lid set loosely on top. You want air to be able to get to the mix, but keep out dust and bugs. Let this mixture sit on your counter at room temperature for 24 hours.
Note: a good way to measure and keep track of growth is with a rubber band around the jar, or just mark the jar with a dry erase marker.
Day 2:
Today we’re going to discard. You’ll discard about half of your starter so that you‘re left with 4 ounces. This doesn’t have to be precise; just eyeball it. Then mix in 4 ounces of water and 4 ounces of flour. Cover and let it sit on your counter for another 24 hours.
Note: don’t throw away your discard! There are a myriad of ways you can use your discard. If you’d like to save up your discard for a few days, just throw it in a jar or container, keep it covered in the fridge, and check out our blog post for a simple sourdough discard waffle (or pancake) recipe!
Days 3-7:
These days are a repeat of Day 2. Discard, feed, cover, and let it sit. Use your rubber band or marker to keep observing growth. Once your starter starts to double, you’re going to start feeding it twice a day, on a 12(ish) hour schedule rather than a 24 hour schedule. This process could take 5 days or up to 2 weeks. Just keep the process going until it’s doing what you want it to do.
Your starter is ready to bake with once you see consistent growth—you want it to at least double (and it could triple) within that 12 hour period. If it’s really happy and vibrant and your kitchen is warm, once you'r starter is mature it could double in 4-6 hours instead of 12. I like to see at least 2 consistent doubles before I consider a new starter ready to use.
Storing your starter:
If you keep your starter on your counter at room temperature, you’re going to need to continue feeding it twice a day. That takes a lot of flour and a lot of babysitting. This can easily be avoided. One way to store your starter is to pop it in the fridge and feed it weekly, or whenever you plan to bake with it. If you’re just trying to keep it alive, discard and feed it once a week.
I use a “no discard” method. When I pull mine out of the fridge, I feed it as usual. Once it’s ready, I take what I need for my recipe, and put the leftovers back in the fridge. The next time I’m ready to use it, I pull it out of the fridge and feed again. I use what’s needed and refrigerate the rest. What I’m using to bake with becomes my discard. Make sense?
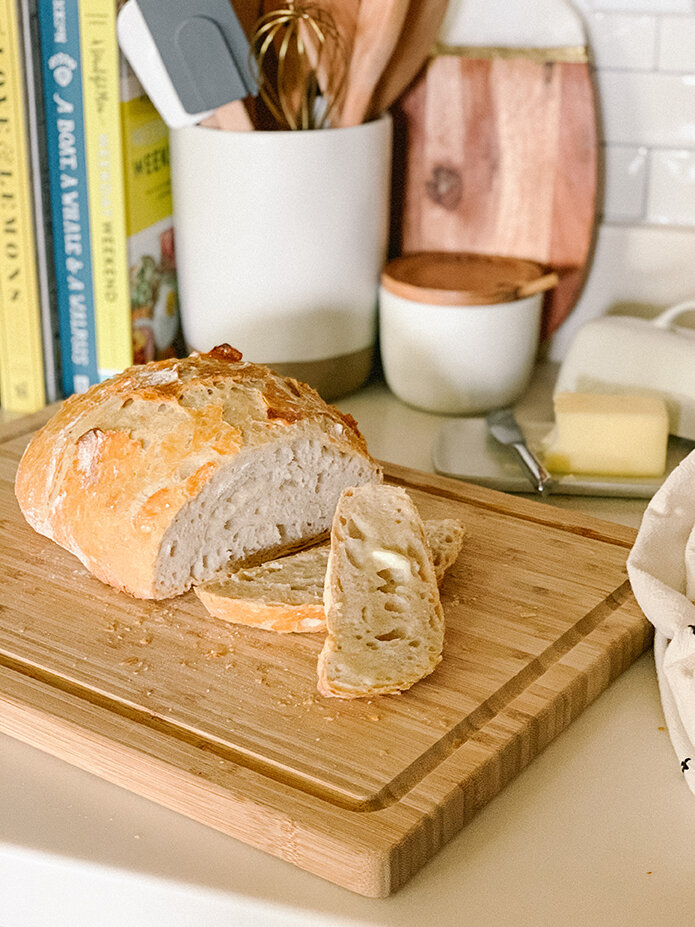
Baking with wild yeast is super satisfying. Taking nothing but flour, water, and a little salt and watching it transform into a beautiful loaf of bakery quality bread is definitely worth the bit of extra time and attention to detail that’s required. Because it really is just a bit of extra attention. Sourdough doesn’t have to be complicated.
For an intro to all things sourdough and some recipes to get you started, head on over to the Dive Collective members page and check out our Sourdough Collective Workshop running this month alongside our Dive: Ruth study.
Kitchen Essentials: Sourdough Starter Edition
These are some of my favorite tools.
My favorite spatula for stirring and scraping is the red one from this set. Solid silicone so it’s really easy to clean.


Now that we, as a Collective have been growing our own sourdough starters, our first Collective Workshop: Sourdough Basics will be beginning this Wednesday (July 1st) so be sure to mark your calendar! This class is for Dive Collective members and will review feeding and maintaining a sourdough starter, as well as instructions on how to bake four different sourdough recipes. Each week will focus on the steps to baking a specific recipe: a rustic loaf, pizza, bagels, and cinnamon rolls.
We’re glad you’re here and can’t wait to see what you bake!
Already a member?
Not a member yet?


While I’m a total sucker for warm, sunny skies, I do love curling up by the fire with a hot cup of something and a good book, and I’ll take advantage of any excuse to spend my day in leggings and a hoodie. (Notice the constant presence of some sort of heat source?) But I have to say, winter’s biggest saving grace is the food. Soups, stews, fresh baked bread. Ultimate comfort food—which is pretty important when we’re freezing our tushies off.